
Bummed about not getting the bike started, I decided I should work on what I have in my hands and can do something about. Wiring.
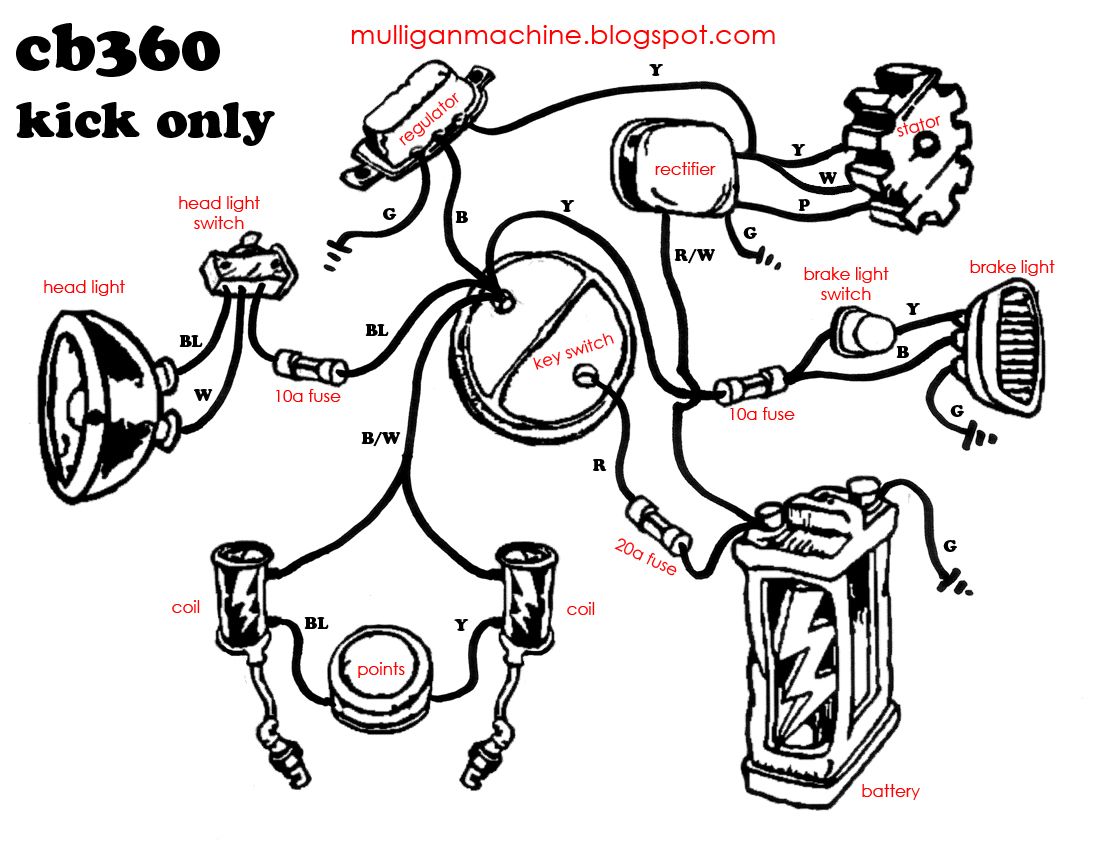
I did a full rewire set up for kick only. The only thing I lack to finish the harness is the lights portion of the loom. Since those run directly from my fuse panel, it won't take but a few minutes to wire up. Here's a quick run down of components I used, and an explanation for each one. Some of this may be common knowledge, but maybe it will help someone out there that is intimidated by wiring or just getting started. Also, stock replacement components or even used parts can be pricey. Most of the components I use are inexpensive parts that can be purchased at stores you can physically go to. That means if you break down, a part is just around the corner.
I have used a keyed ignition switch from Tractor Supply intended for a Ford tractor with good success over the years, so it was a no brainer. SKU number 0236570 It costs $15.99, and so far I have yet to have one fail on me. Usually I de-solder the connections and use my own spades to connect. I am sure these are just re-branded units, but I have a TSC right down the block from my house.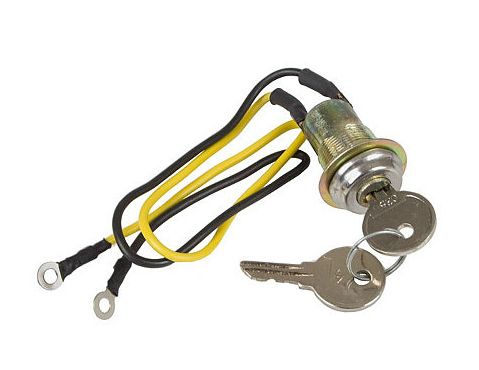
Another item I like to use for a new wiring harness is a Buss ATC Fuse Panel with 6 connections Item number 15600-06-02. You run your main power through the post, and out through each terminal you run power to the lights or any accessory in your loom. Having six connections usually leaves a couple spots to hold some spares, and it's super simple to mount. I got mine through AutoZone, but you can get these at just about any parts store. Rough cost of $7-10.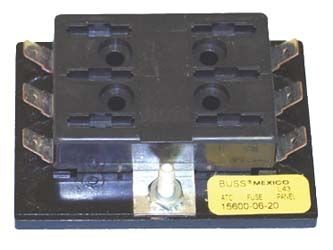
I also run an inline fuse from the battery positive to the key switch for an extra bit of safety. Any parts store should have one, and usually for less than $4.
The Radio Shack rectifier has been discussed before a lot, but it couldn't hurt to lump it all in anyways. Item number 276-1185 25A, 50V Full-Wave Bridge Rectifier for $3.49. Cheap enough you can carry a spare without your wallet even knowing, and in stock at the store.
+ to battery
- to ground
~ pink
~ white and yellow combined
The ~ connections can be switched, so you can't get them mixed up.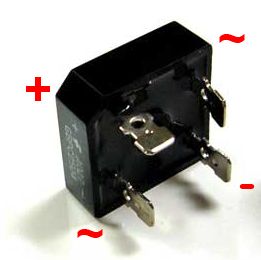
The battery I chose is a 12v SLA 4.5ah from ebay for $13.94 shipped. The dimensions are 4"H x 3.5"L x 2.75W. I have run as small as 2.2ah before without issue and could go smaller, but figured since I had the room I could go a bit bigger. This battery will not provide enough juice for the starter, so it is a kick only application. I have used 7ah before for starters, but your bike will need to be well tuned and a quick starter, as they run out of juice quick.
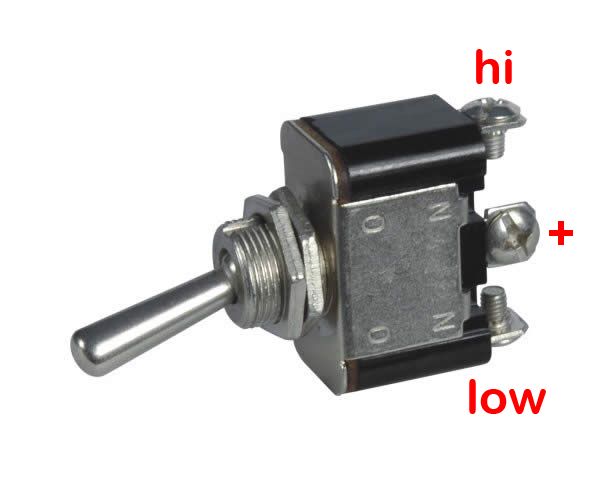
On to the light switch setup. Usually I would use a DPDT on/off/on switch to control the lights. It has 6 terminals, so I would normally run a brake light power lead to both on positions on one side, while putting a hi/lo to the other on connections. Unfortunately the cb350 doesn't charge too well with the headlight on all the time, so I want to run a simple SPST on/off for the tail light and a 3 terminal SPDT on/off/on for the head light. Each switch is needed so that if I am low on battery juice, I can get every ounce of power to the coils by cutting all power to the lights. Each switch will run you roughly $3-10.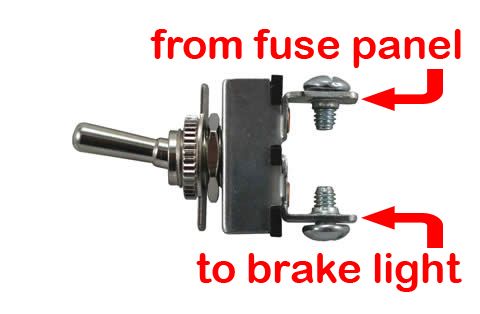
I will use the stock regulator and coils, but if the stock coils go out, I will run a pair of these 12v 4.7ohm ones from z1enterprises for $14.72 each. Part number EM24-71512 For a stock points ignition these work great, and cost a considerable amount less than Dynas or a pair of junk used stockers.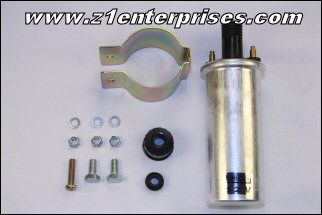
That about sums it up. I'll be taking some new pics of where and how everything is mounted soon.
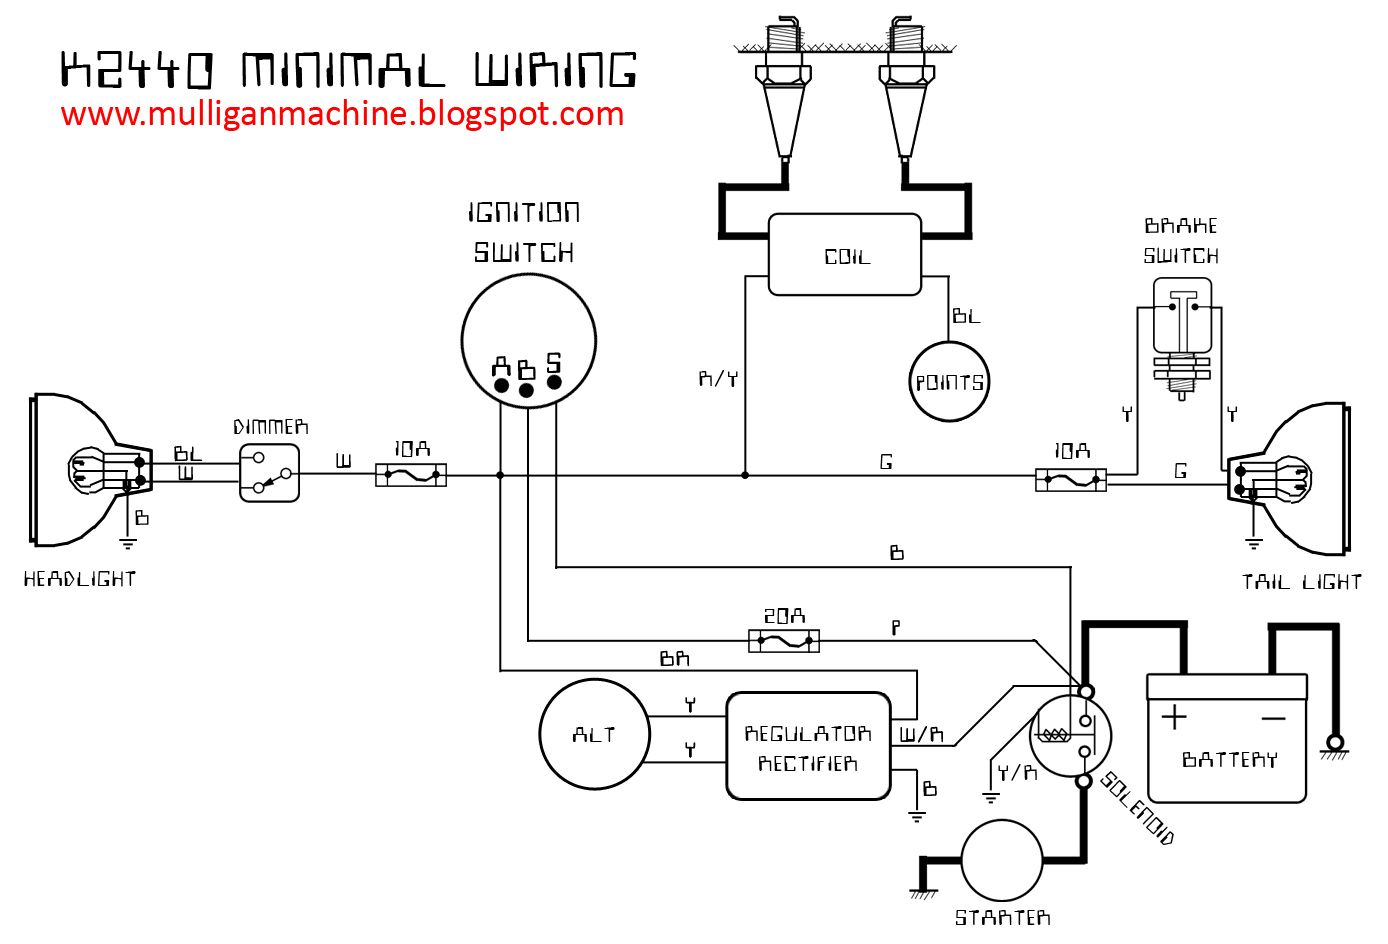
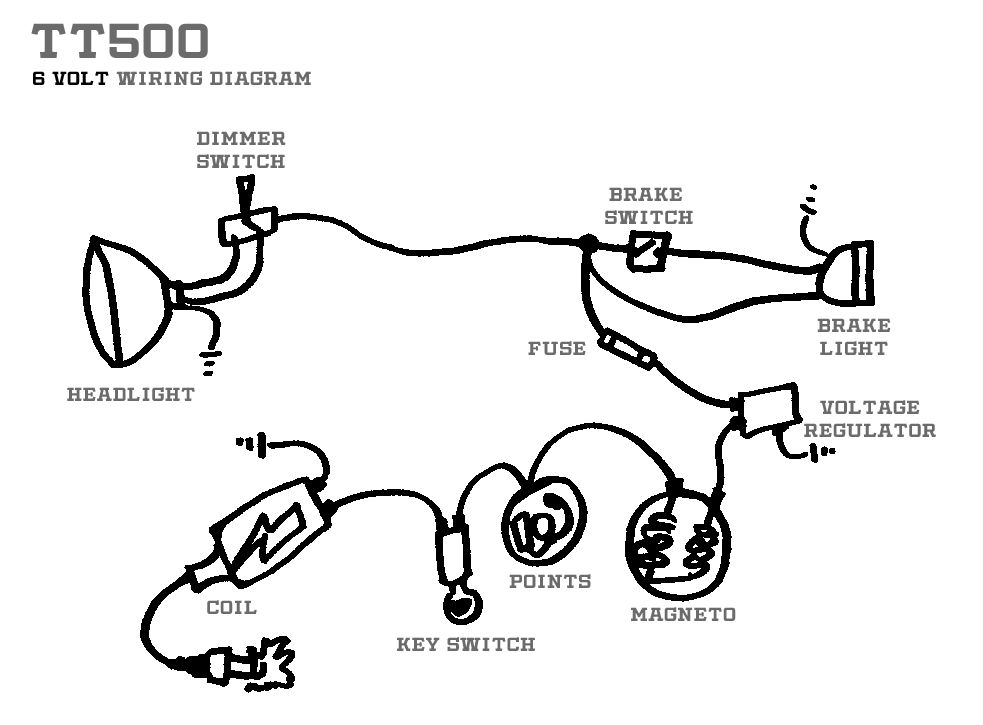
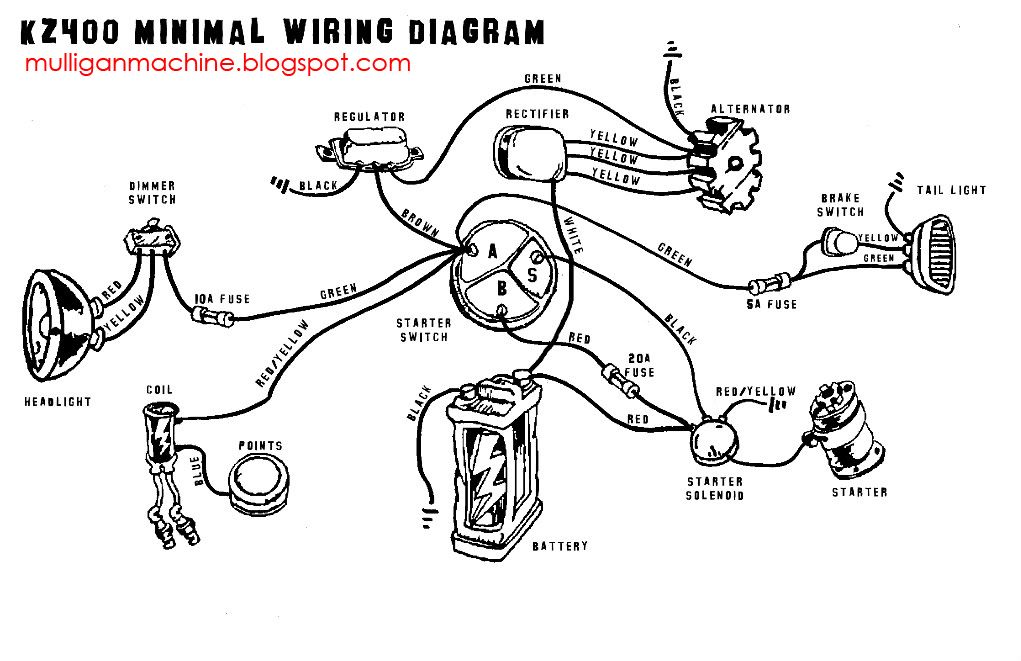
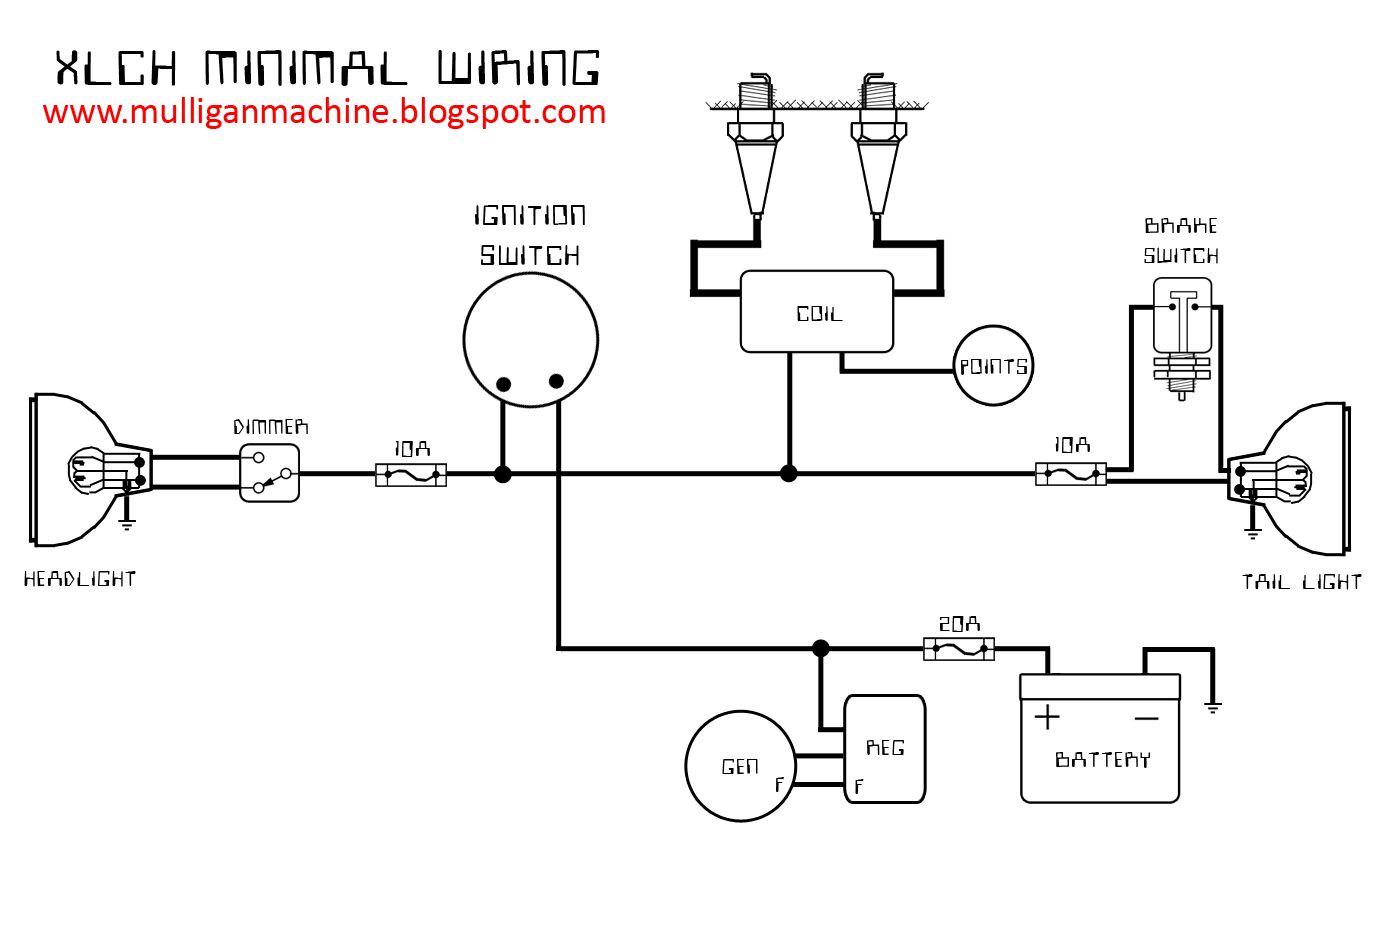
Here's the basic wiring diagram I used.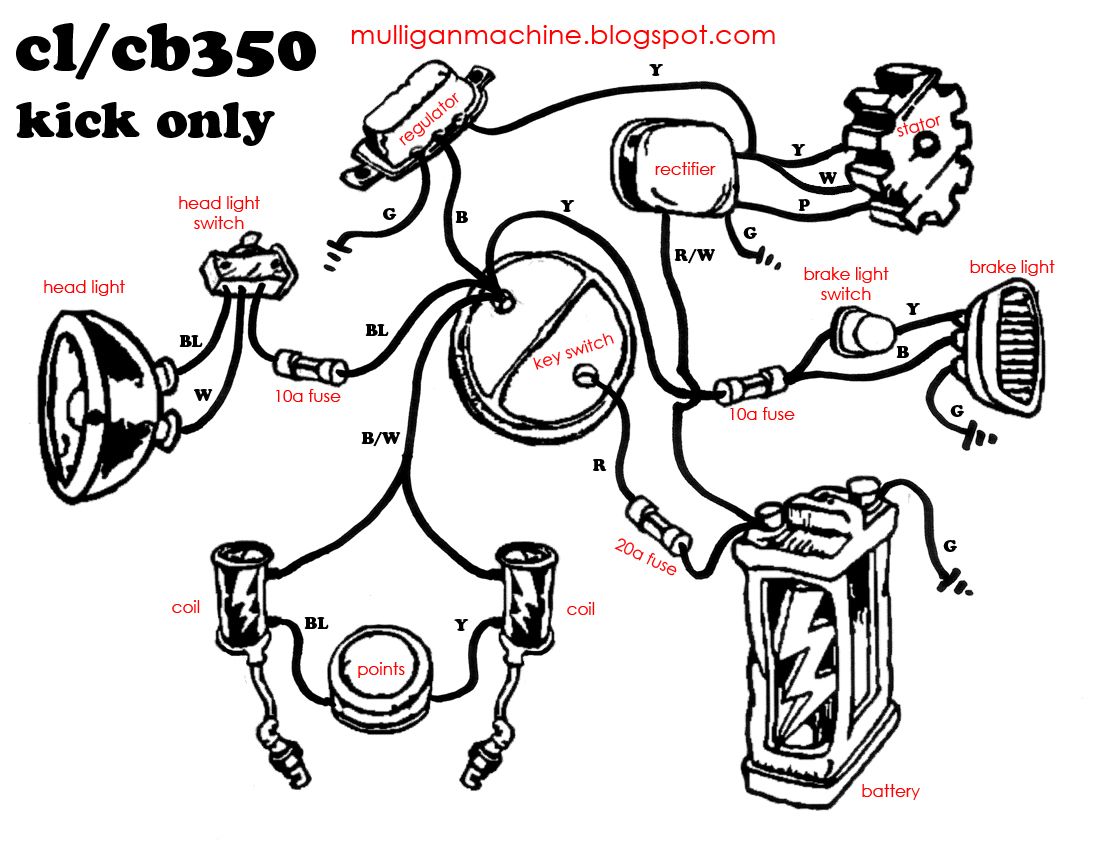
3/23/12
cl350 build/entry : part 9
Subscribe to:
Post Comments (Atom)
4 comments:
thank you thank you thank you, i'm indebted to you for this post !
Have always enjoyed your blogs, but this build is saving me some heartache as well...
Cheers
Michael
You are very welcome. Glad it is of some help, and let me know if you have any questions.
Would this all apply to a 75 cb360?
Yes. It should all work the same including the diagram. Let me know if you need any further explanation.
Post a Comment