
Paint on the front fender, fairing and frame etc is done. Final assembly is started! The body work on the tank and tail isn't finished yet. They will be very last along with the seat - which my mother in-law is going to cover for me.
Brad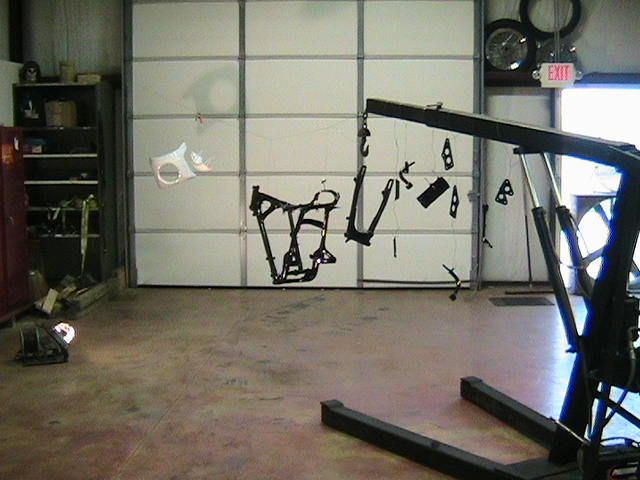

3/31/11
cb450 build/entry : part 10
3/25/11
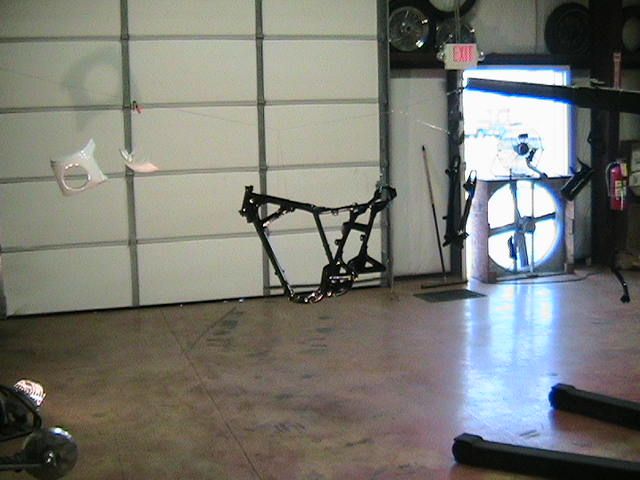
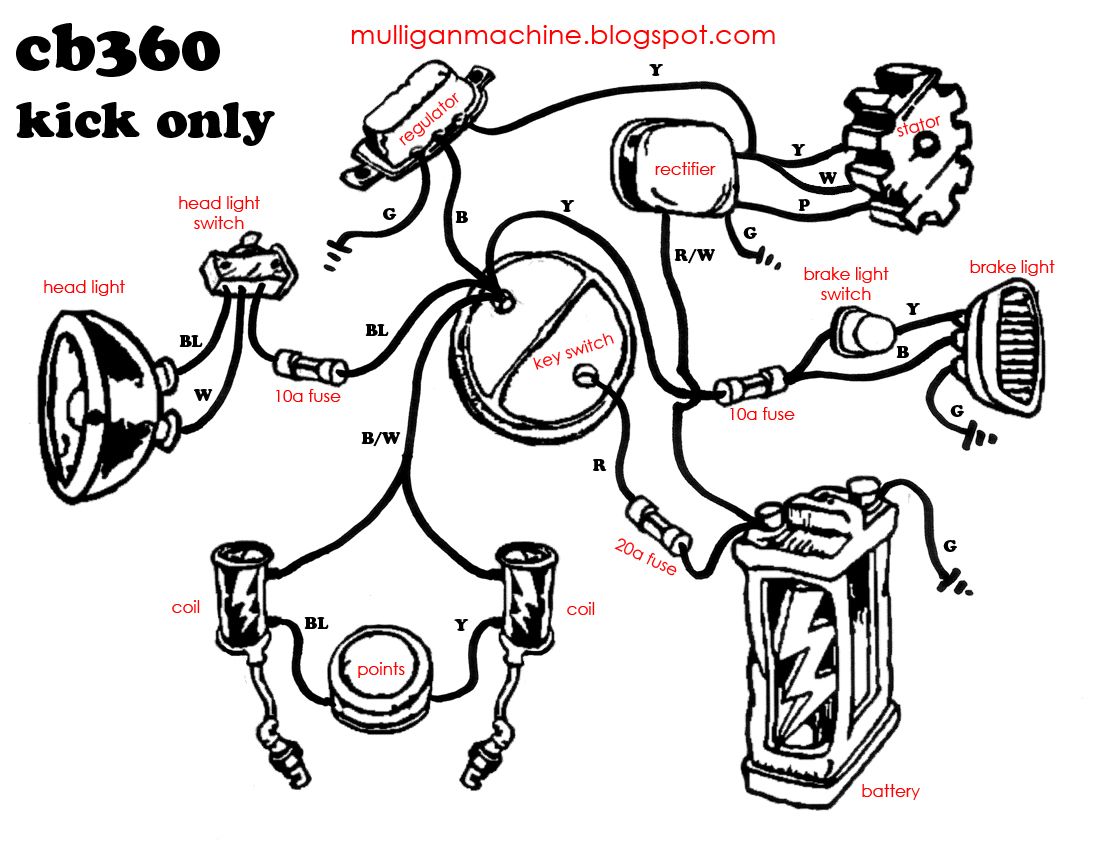
cb360 build/entry : part 1
Another build saga begins for the Ozark Mountain Scramble.
A few weeks ago I stumbled upon a couple basketcase Hondas for $100. Couldn't resist the price, so $50 later in gas I had some future projects lined up. Fast forward a couple weeks, and a brother-in-law (Cail) is eyeballing a buddy's project dubbed Street Raper while in the garage. He's into it, and wants to build his own with a twist, so I offered up the Cb360 for what it cost me. The deal has been struck, and he has been a permanent fixture in my garage since the day of purchase. I'll see about whipping up a proper photoshop of the direction this one is headed, but you can rest assured this thing has to be built on the cheap.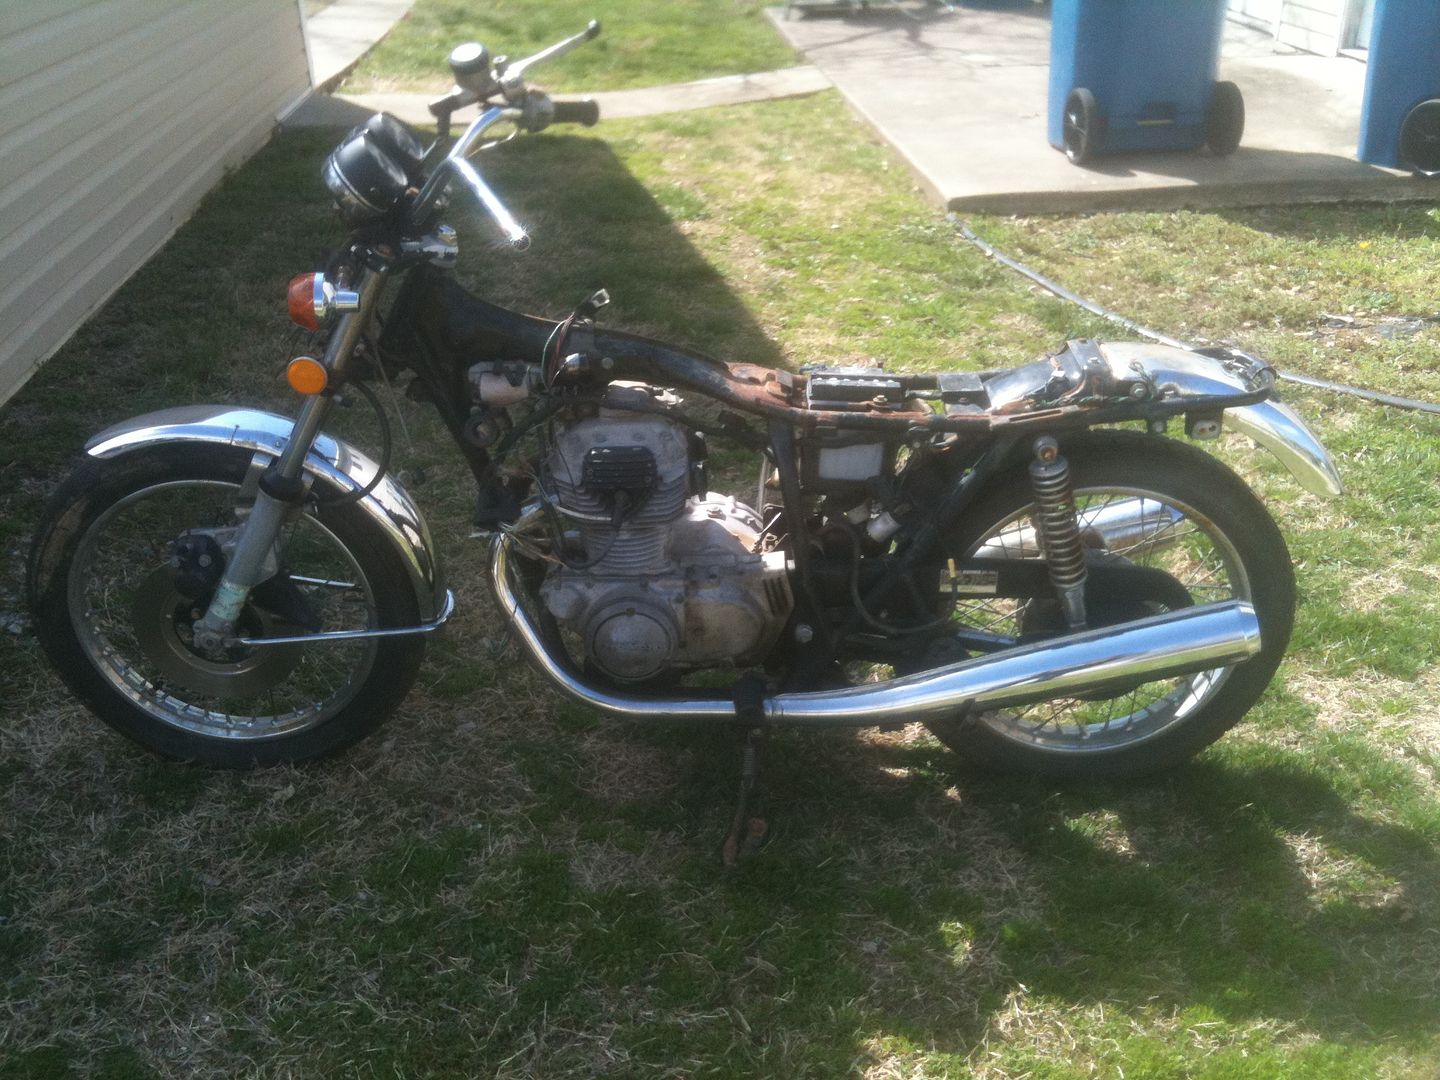
Within the first day, the motor was removed from the frame to begin the rebirth. So far the majority of work has been focusing on getting everything cleaned up and inspecting parts to see what needs replaced. The list of parts is growing, but with some proper budgeting things will begin to roll soon.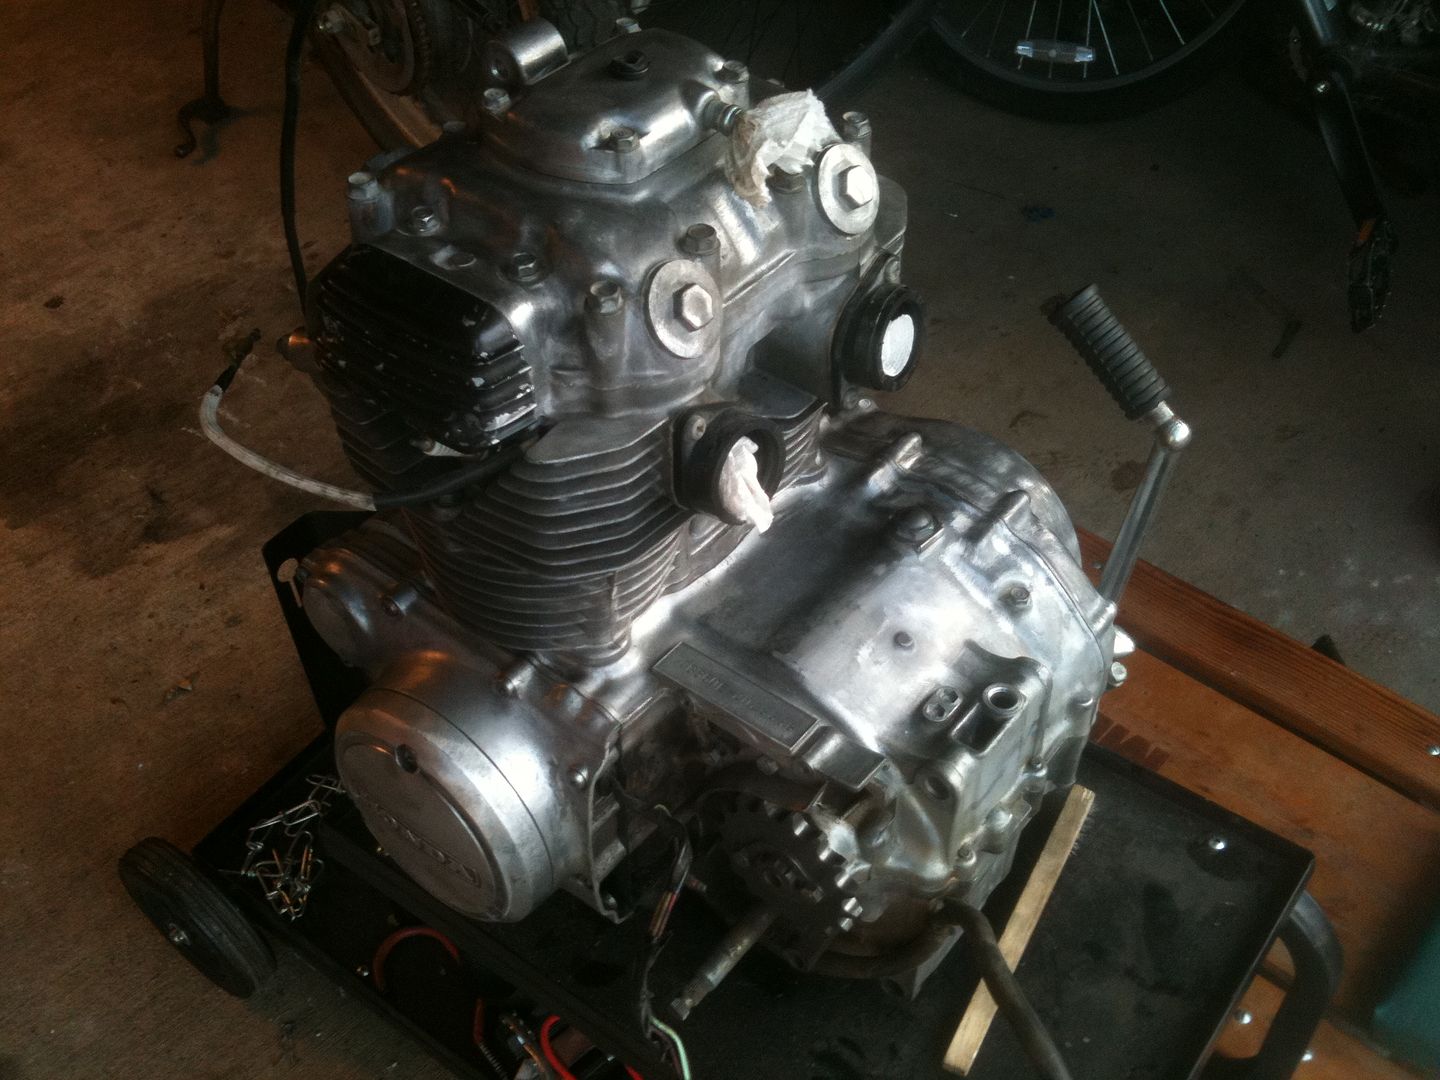
3/24/11
kz400 build/entry : part 12
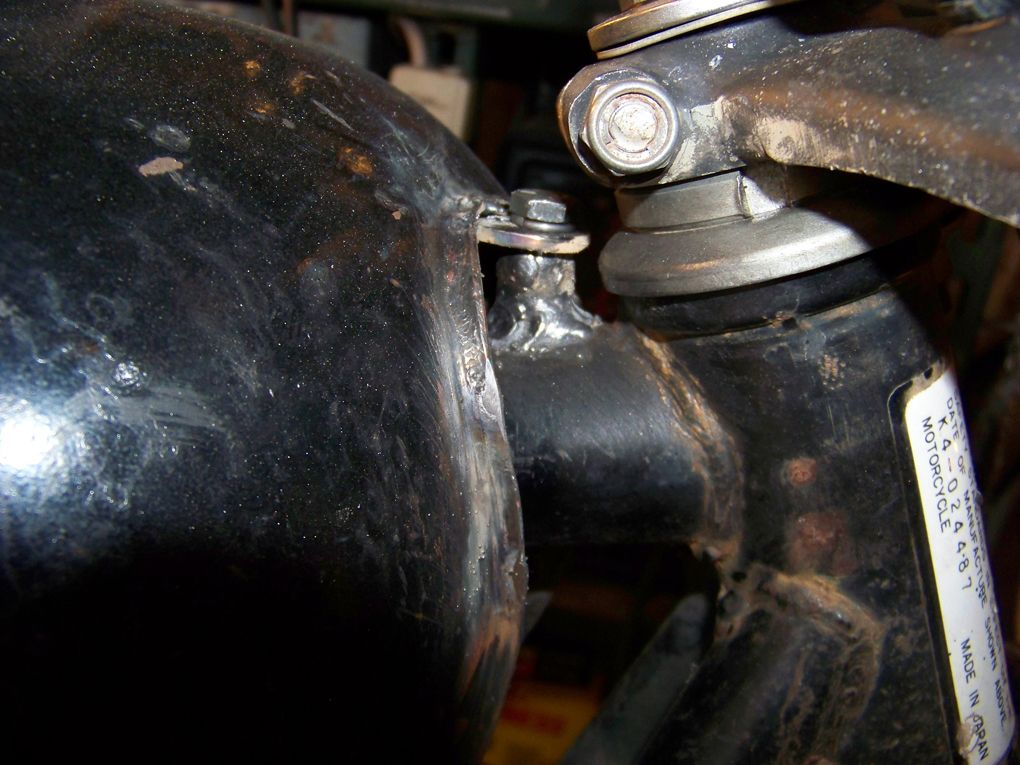
I finally got a chance to meet up with Brad to get my fork leg with the previously mentioned brake stay welded on. I couldn't be any happier with the outcome. Brad's a solid dude and has come through time after time with little persuasion.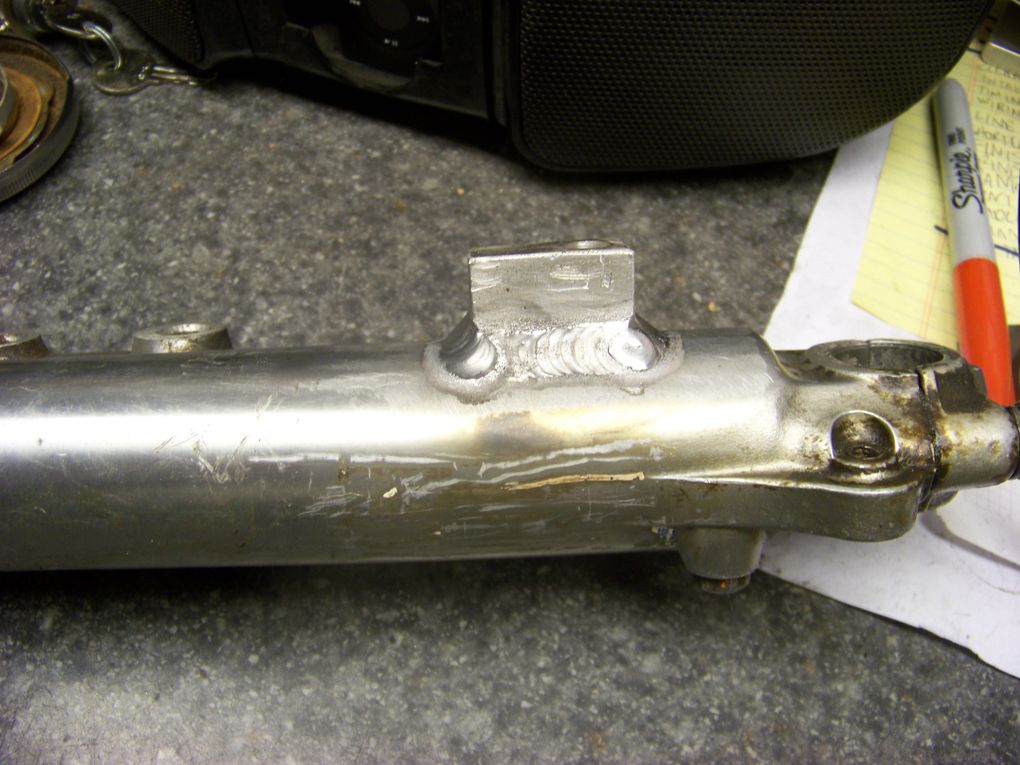
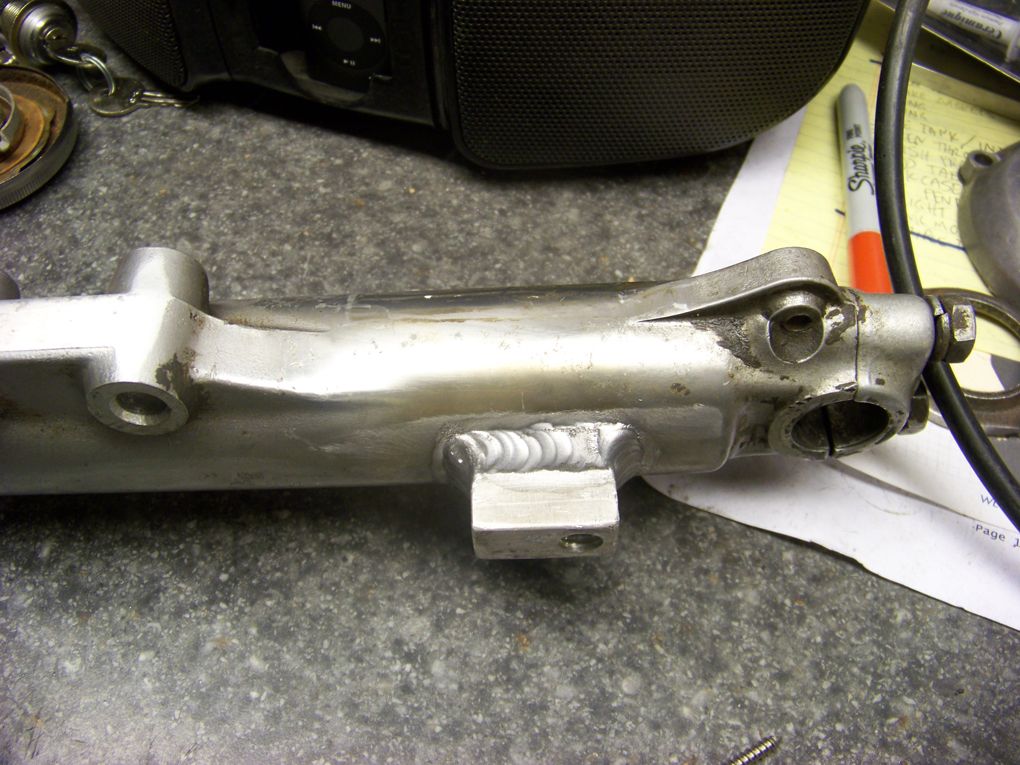
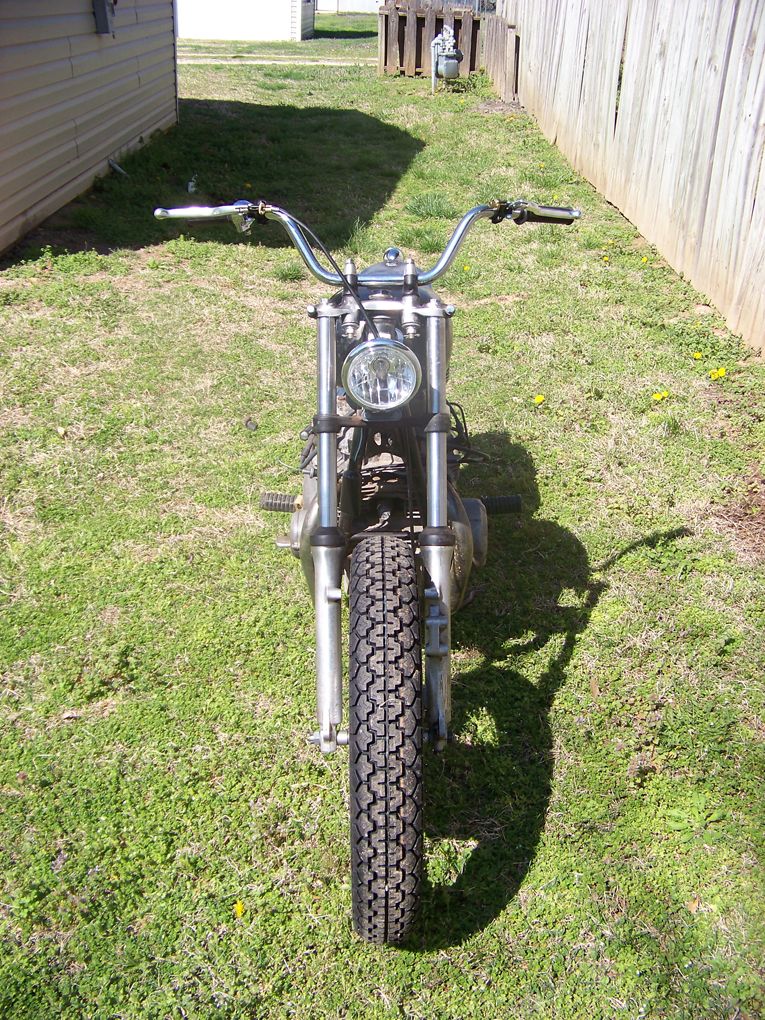
With the leg back in possession, I went directly into mock up mode to see how it all came together. Everything fits/works properly and looks exactly like planned. The old caliper mounts still need trimmed off, but that can wait a while.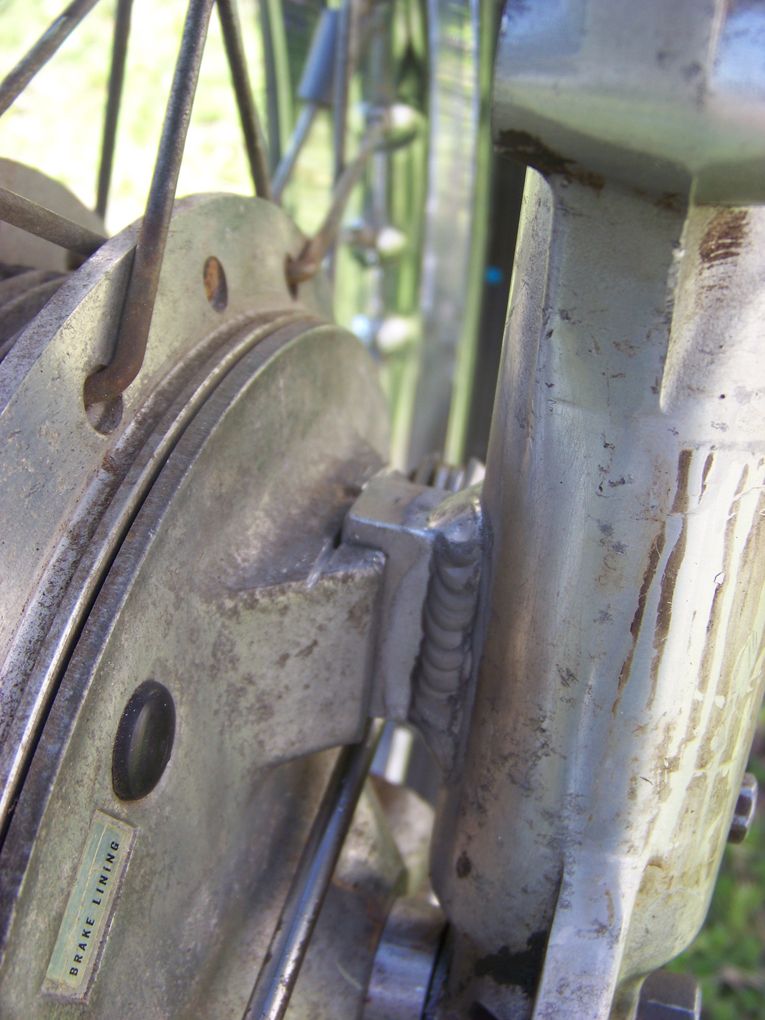

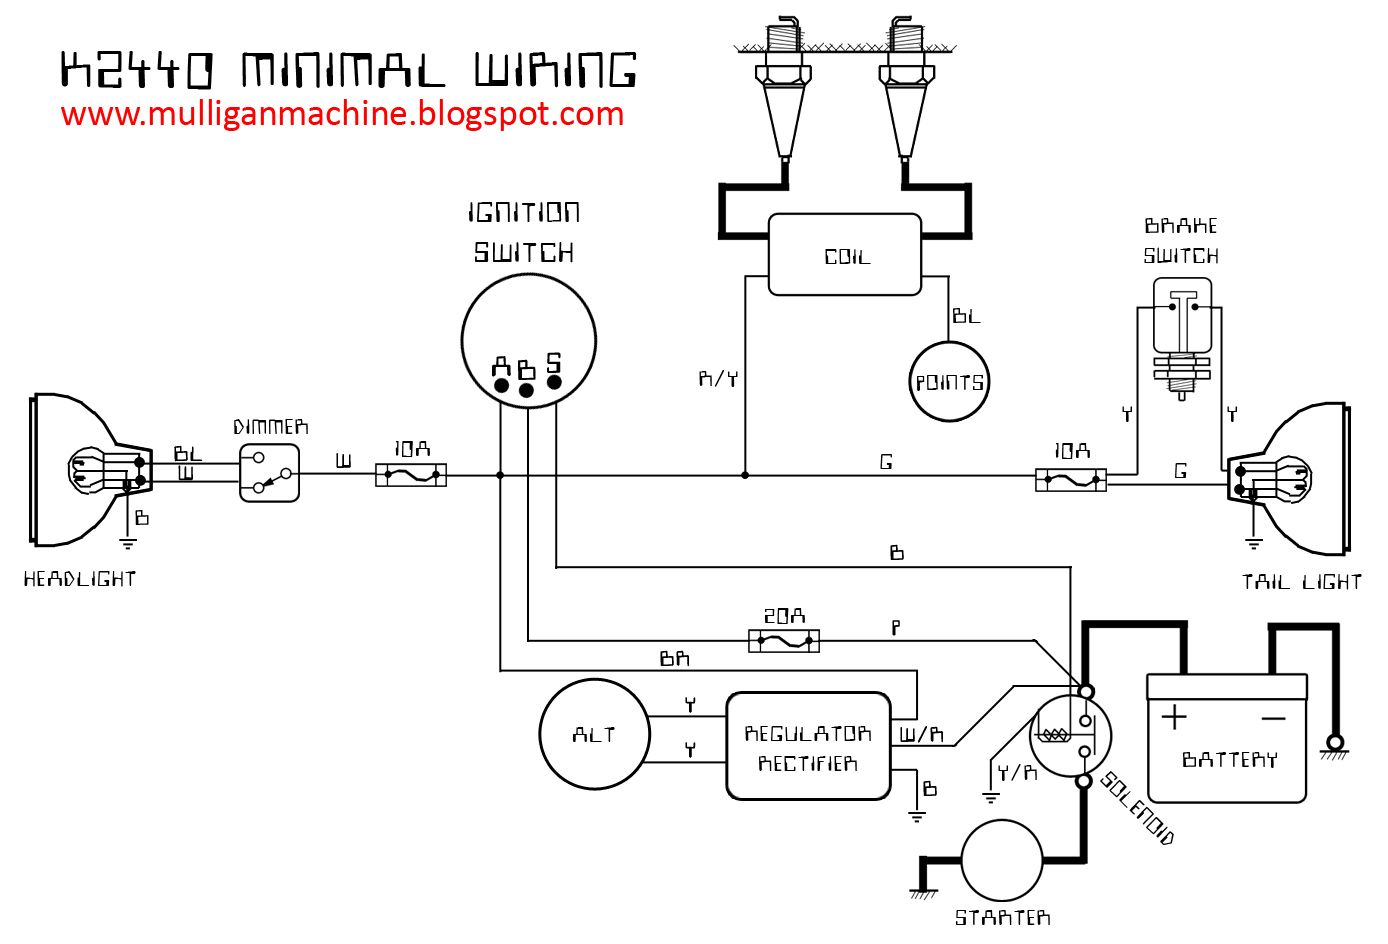
Other notes of interest would be the gas tank has been lined as well as the intake's last liner touch up necessary to have a good clean leak free fuel system.It's 96 hours for a full cure time, so I have a day or so before I can saturate it with fuel. Wiring is next on the agenda, so hopefully I can get a quick fire out of the beast this weekend including a video of the rumble.
3/17/11
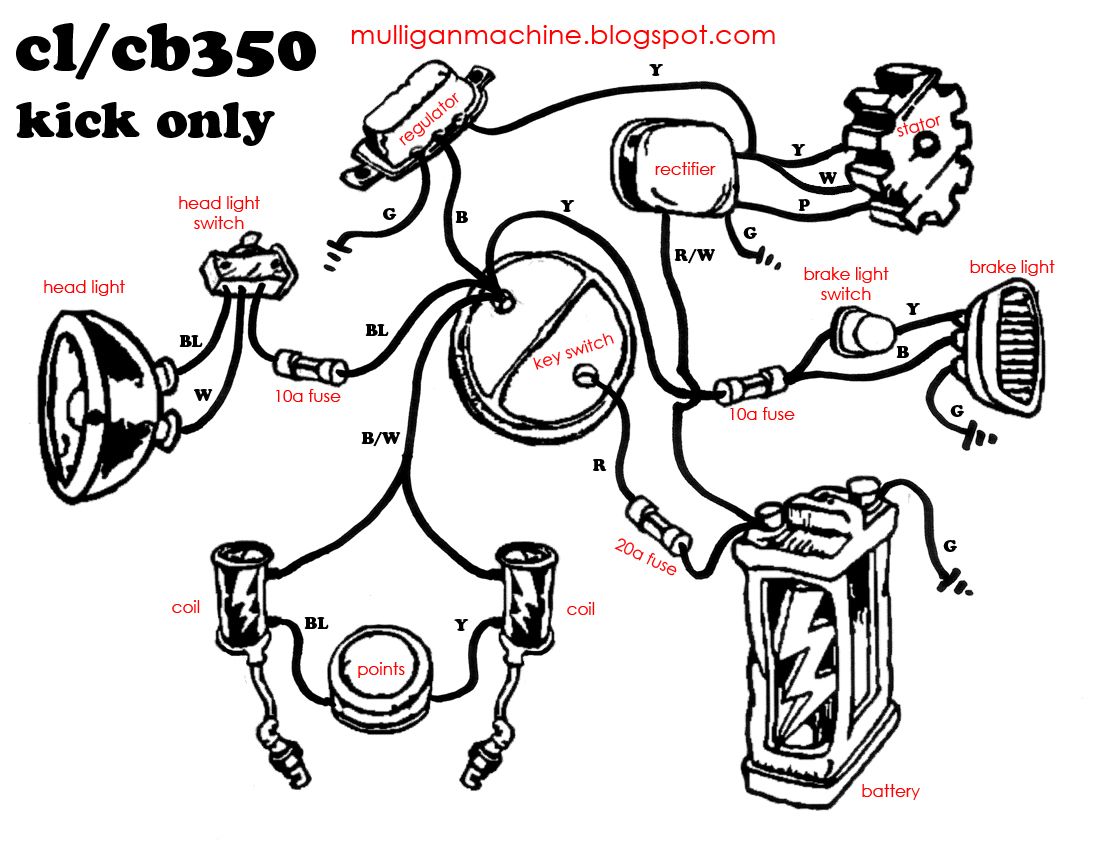
cb350 build/entry : part 3

Had a few setbacks, but I've also made some good progress lately. The new tapered-roller bearings worked out great. All-Balls Bearings makes a universal kit, that fits almost all the early Honda CB's. I ran into a problem, but I can't blame it on the bearings. The CB550 fork is not a bolt-on swap to the CB350 twin. The CB550 triple tree stem was about a half-inch too short for my frame. My solution was to slice off the top bearing cup, and lower it down into the frame. Luckily, I know a good welder. I took it over to Brad's shop yesterday. He laid down a nice bead. Now it's better than new. My son (Eli) helped me put the fork together last night. He's showing some interest, so that's good.
My new tank came in the mail today. I am very happy. I found a "scratch-n-dent" motorcycle-tank supplier. This tank is NOS brand-new. The one dent (in the top) is hard to see. It will fit this build much better than the other tank, which would have been too wide for the clip-ons anyway. The thing I don't like about it is the emblem-holder bracket on the side. That's about the least of my worries though. This tank was listed as "un-identified". It has an odd hole in the bottom. I'm guessing that may have been for a fuel gauge but I really don't care. I can weld that one myself. I don't have to deal with rust. Twenty-five bucks plus ship. Yeah, I'm happy.
Rand Man
P.S. I also got my new rear tire and and wheel mounted.
3/15/11
cb450 build/entry : part 9
All the fab work is done. bike is blasted apart for final cleaning, detailing, paint and reassembly. It has been a little slow going on the engine since I am cutting all my own gaskets etc but here's a picture of it so far. Simple semi gloss black on the cases and cam covers, just a good scrubbing on the jugs and head, and beadblast/scotchbrite on the side covers and cam adjuster covers.
Brad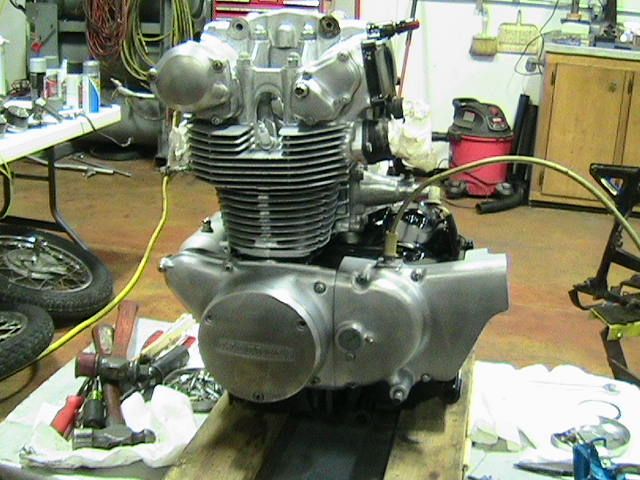
3/14/11
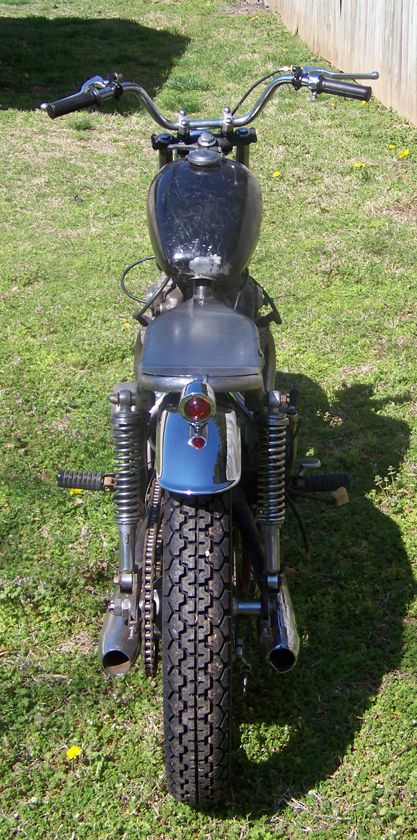
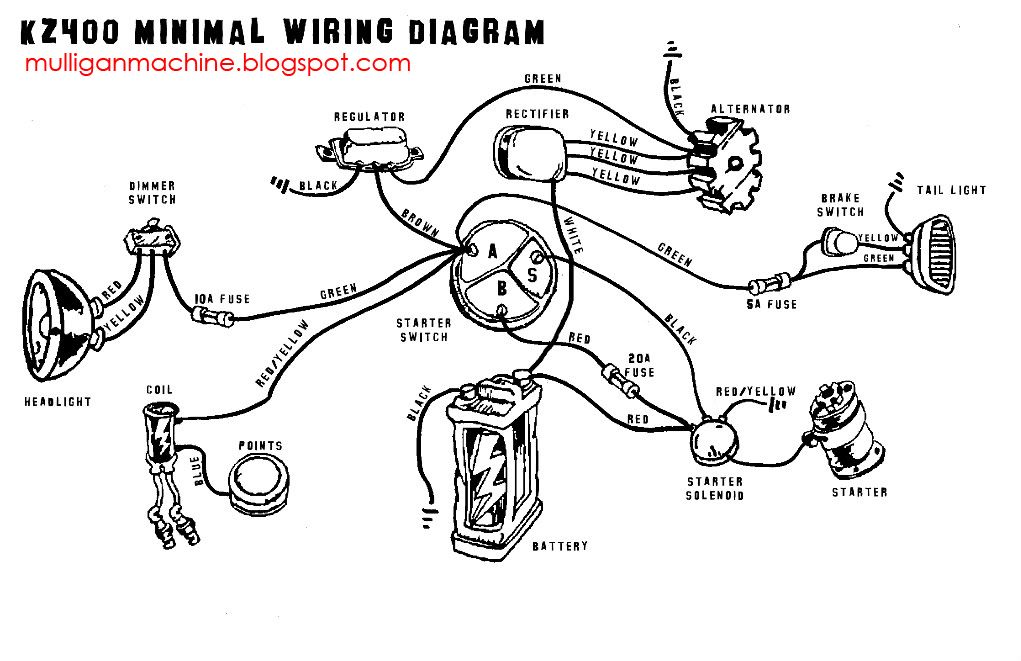
kz400 build/entry : part 11
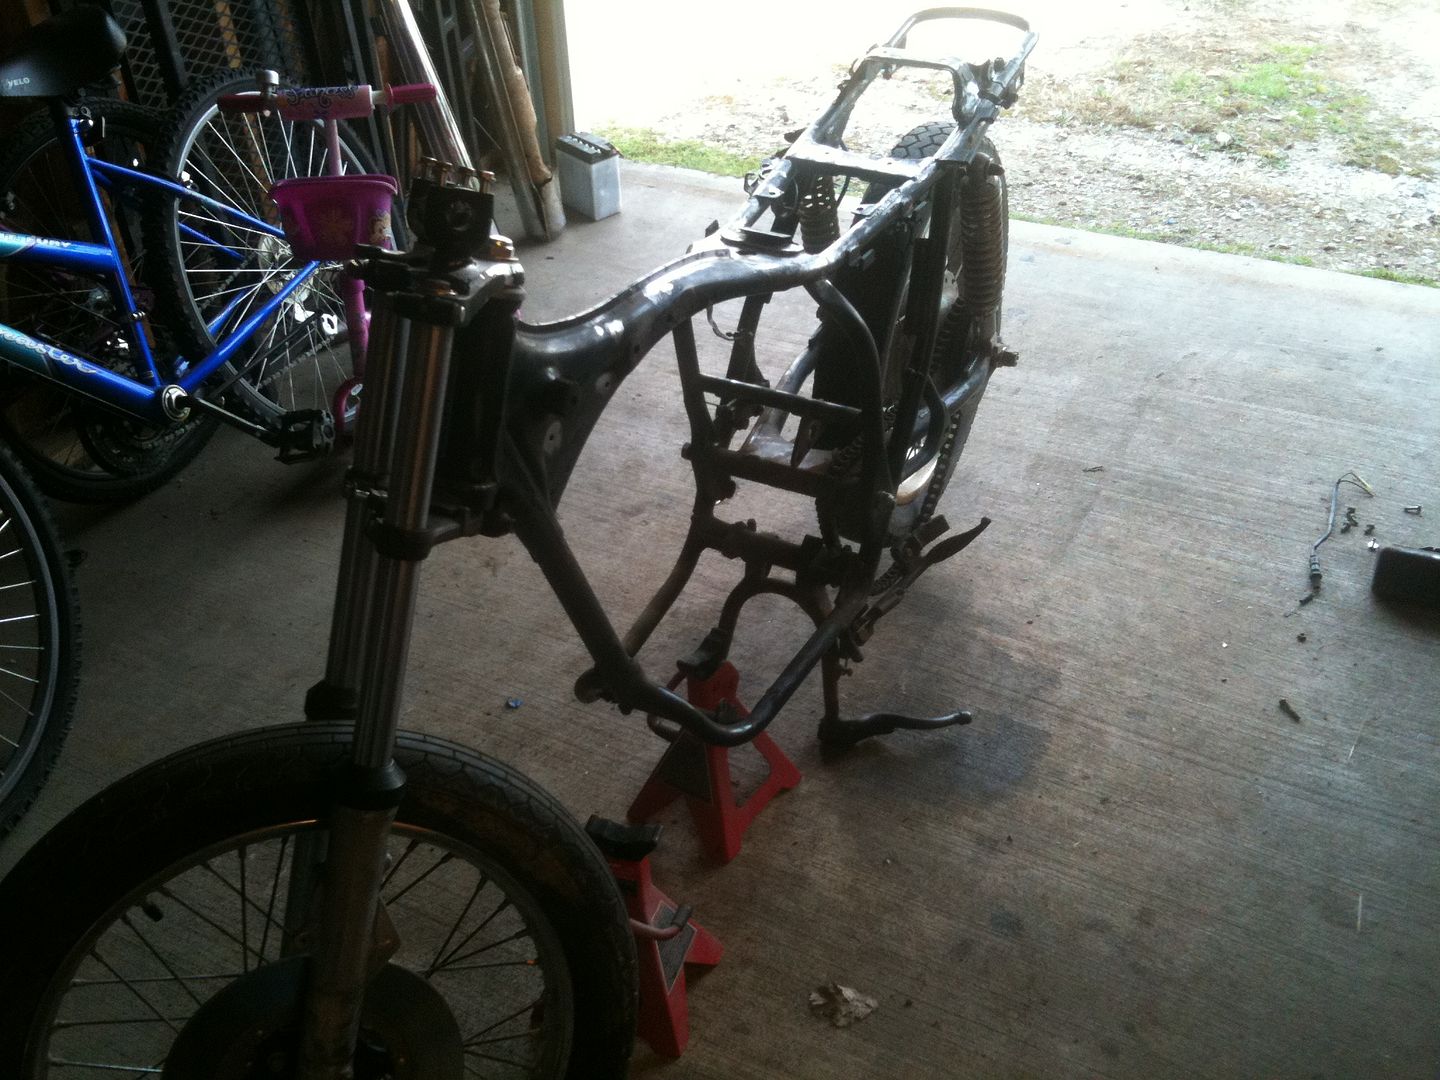
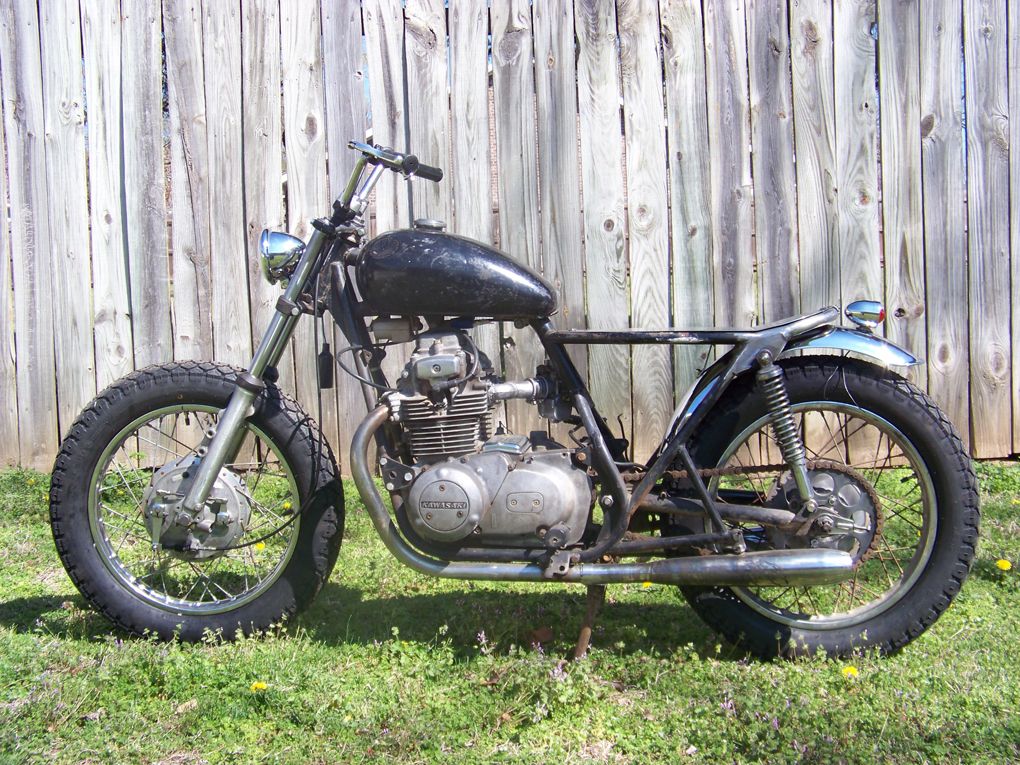
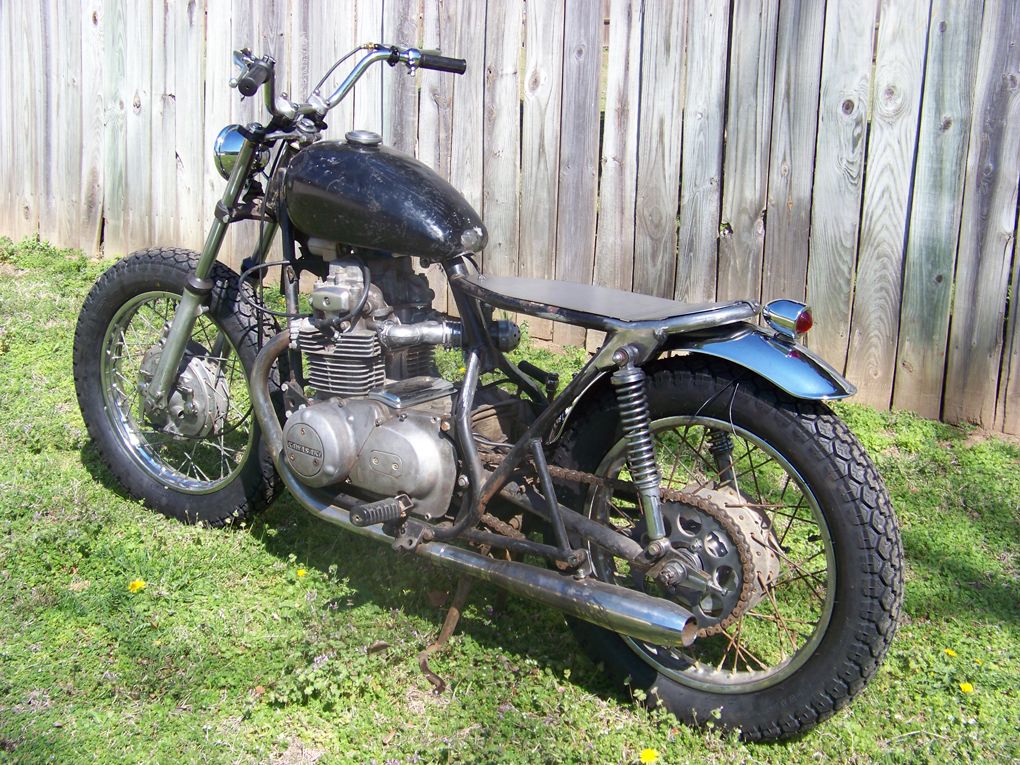
My deadline of having a running bike by the end of March is creeping up, so it's time to get some stuff checked off the list.
Rear tank mount.
Front tank mount.
New levers/perches.
New rear fender and tail light mounted. Crappy pic, so I'll get some new ones to post up when the front end is back together. Also note the seat foam construction in progress.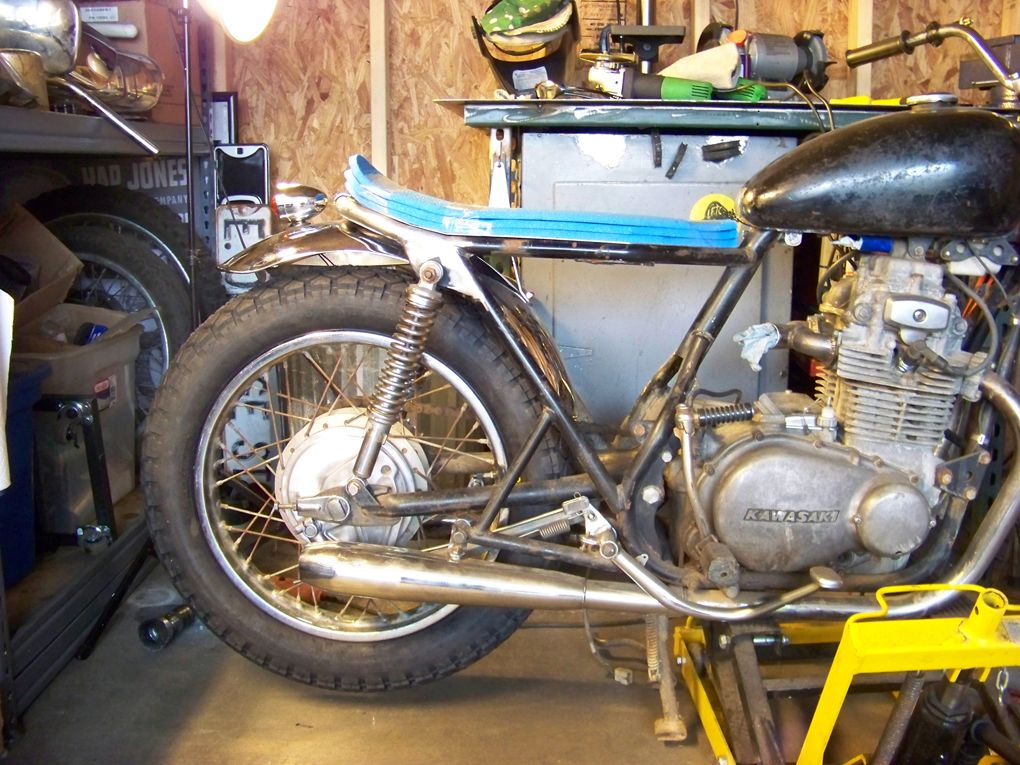
Invisible forks shot.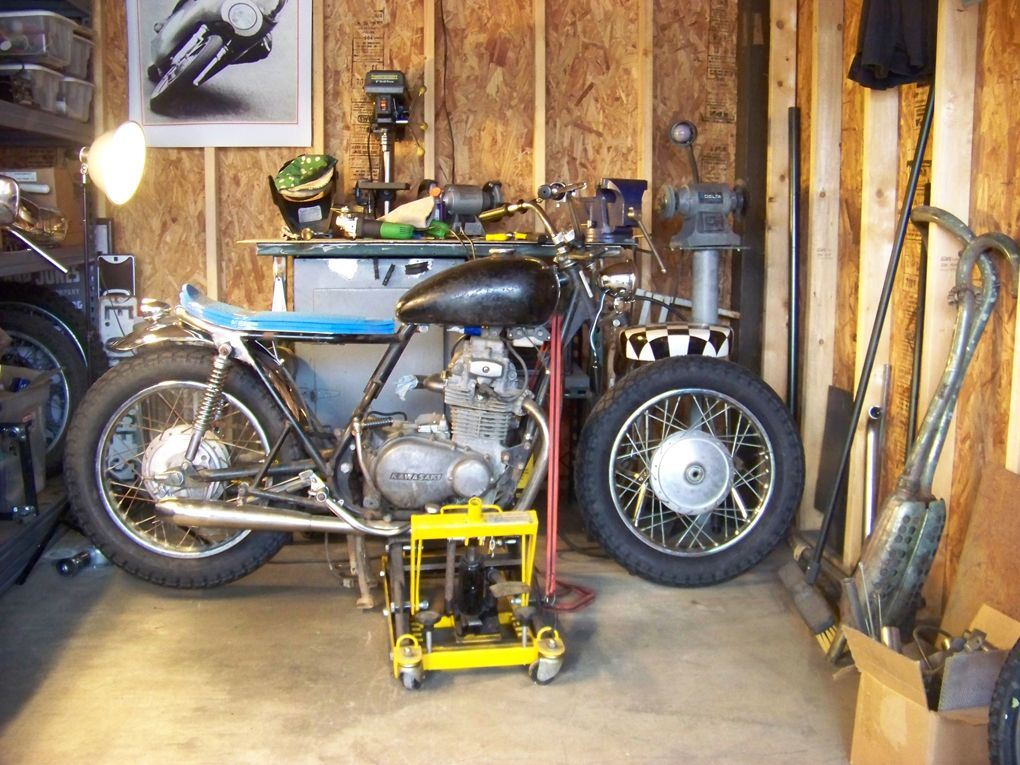
3/10/11
cl350 build concept
Idle time at work, so I decided to figure out which direction to take the cl350 project. I really dig vintage Italian and Spanish bikes, so the plan is to build my version of one with a bike I can actually afford to build.
3/8/11
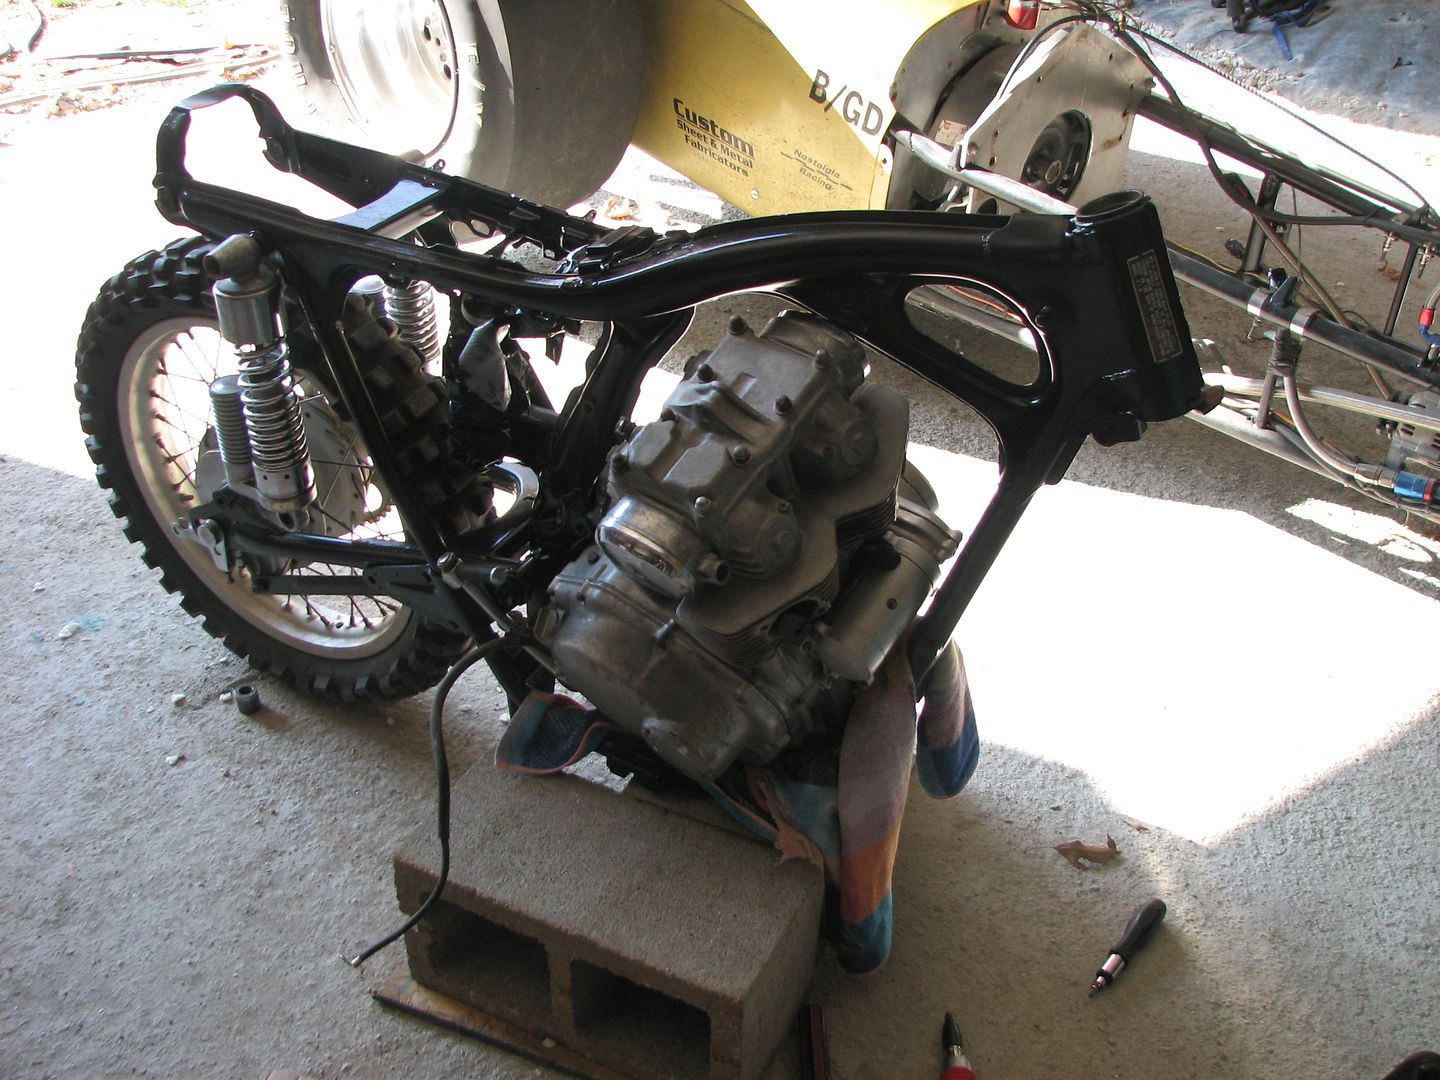
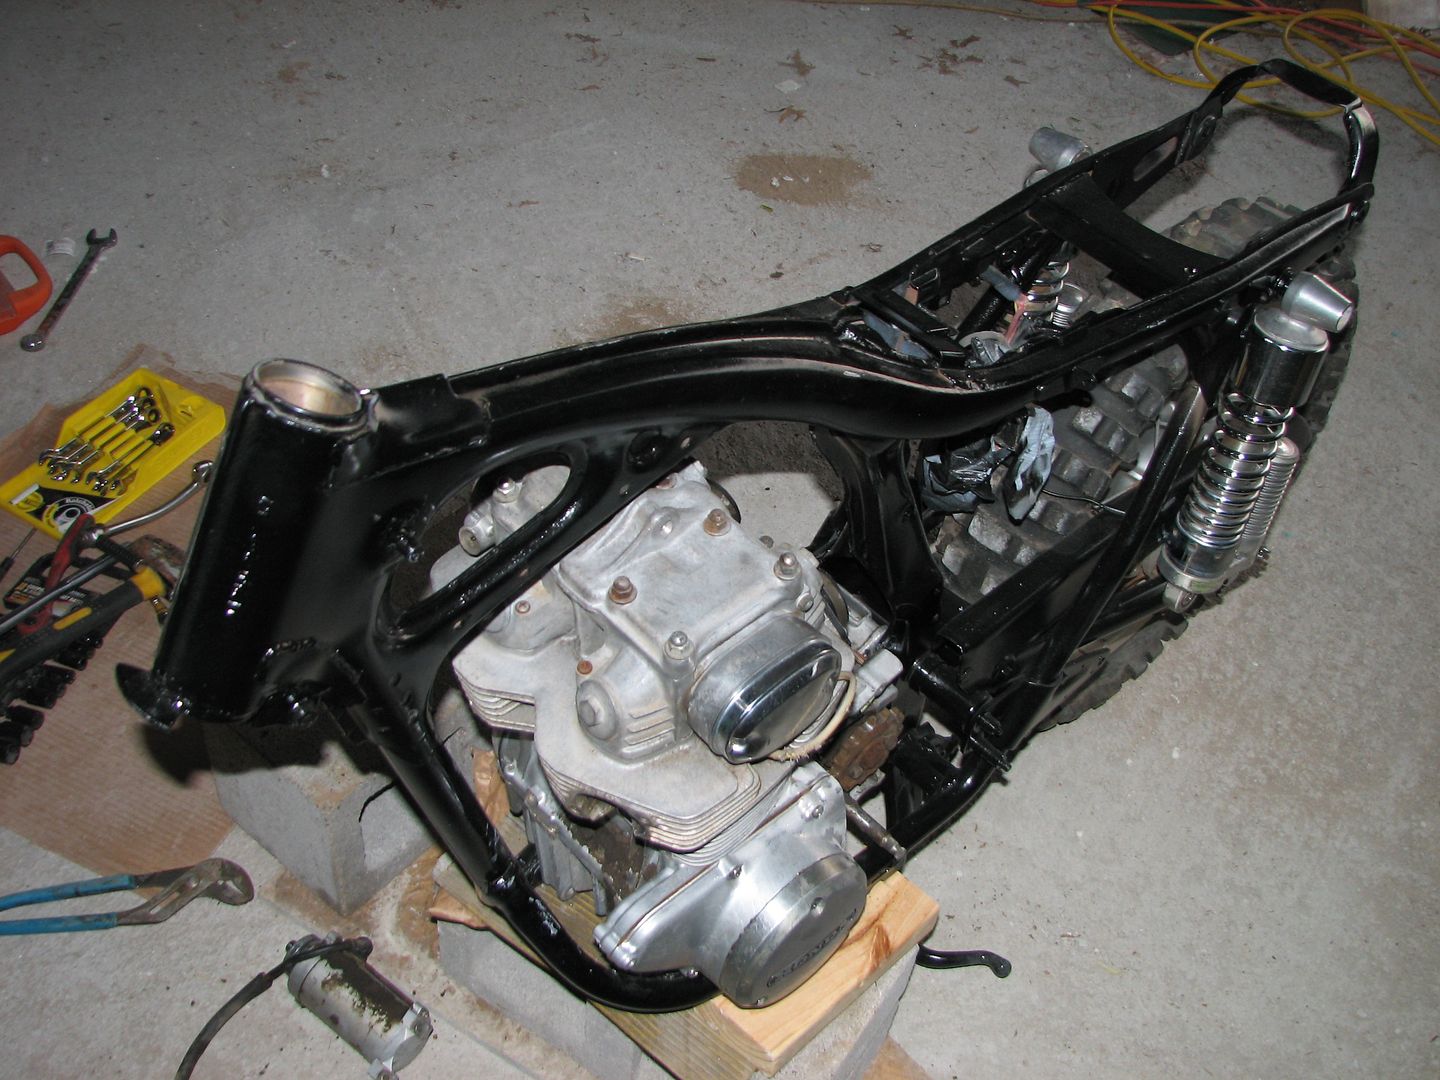
cb350 build/entry : part 2
Last week worked-out pretty well for me and the old CB. I had been at odds with my sand blaster. It has had problems with starting and stopping and could only produce a weak stream. I did a bit of surgery; added an old 80 gal tank I had, for more reserve air capacity. It also helps catch some moisture. Plenty of dry air is the only way to get this thing to work. I was able to take off work early, for several days this week. I really enjoyed the sunshine. After I had removed enough crust, I moved over to the paint booth (yard).
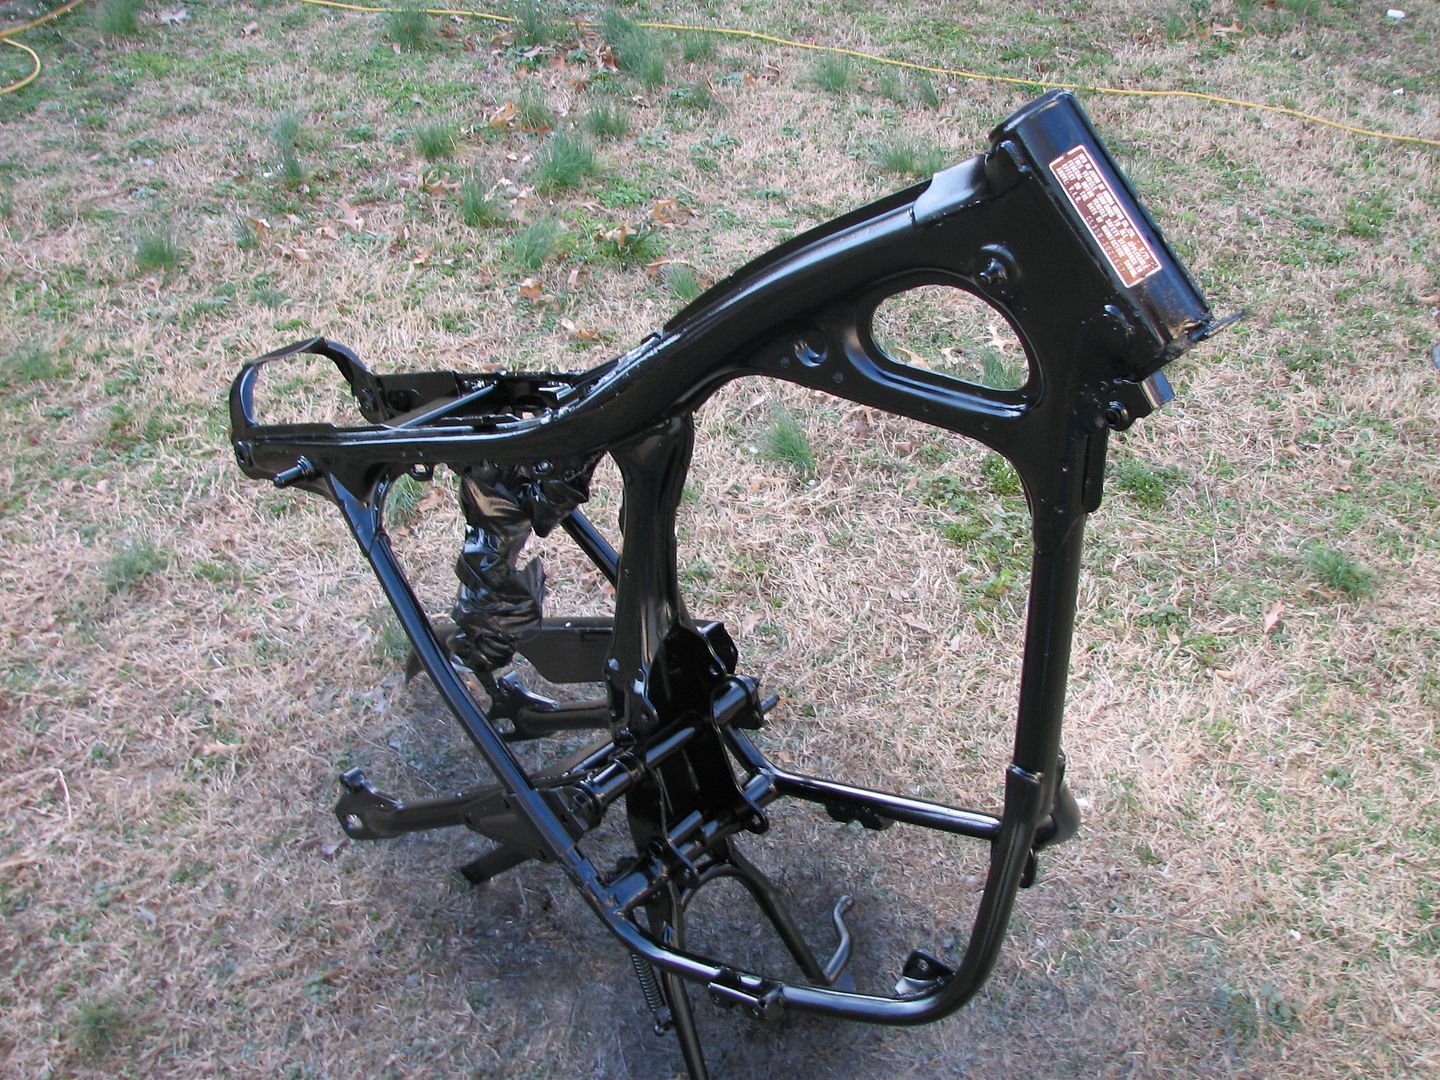
I scrounged through my junk bins and found just what I needed. I had just enough self-etching primer and gloss black paint to do the job. This time my hoarding paid-off. It's good urethane auto paint, so it should hold up well for chassis duty. I'm calling the frame paint job "free". The materials were scraps that a normal person would have thrown-out years ago.
I spent quite a bit of time searching for steering stem bearings. I went to local parts stores and an industrial bearing supplier: no luck. I might as well have brought in a piece of space-junk, as to laid an old bearing and a set of calipers on the counter. The old Honda bearings have part numbers on them, but if those numbers don't show up after they hit the "enter" button, they don't exist. A call to the dealership didn't get me anywhere either. I finally ordered a kit off the bay. I'll let you know how that turns out.
Next, I wanted to get that engine in. I had it cleaned up, thought it would be easy, then I hit a snag. It would not fit. I wrestled that stubborn bastard 'til I was tired. After I slept on it, the solution wasn't too hard to figure. A trip to Harbor Freight got me an impact driver for $6.99. No self-respecting motorcycle mechanic should be without one. Off came the starter, the kick-start lever, and my paint protection towel; slipped in like it was supposed to.
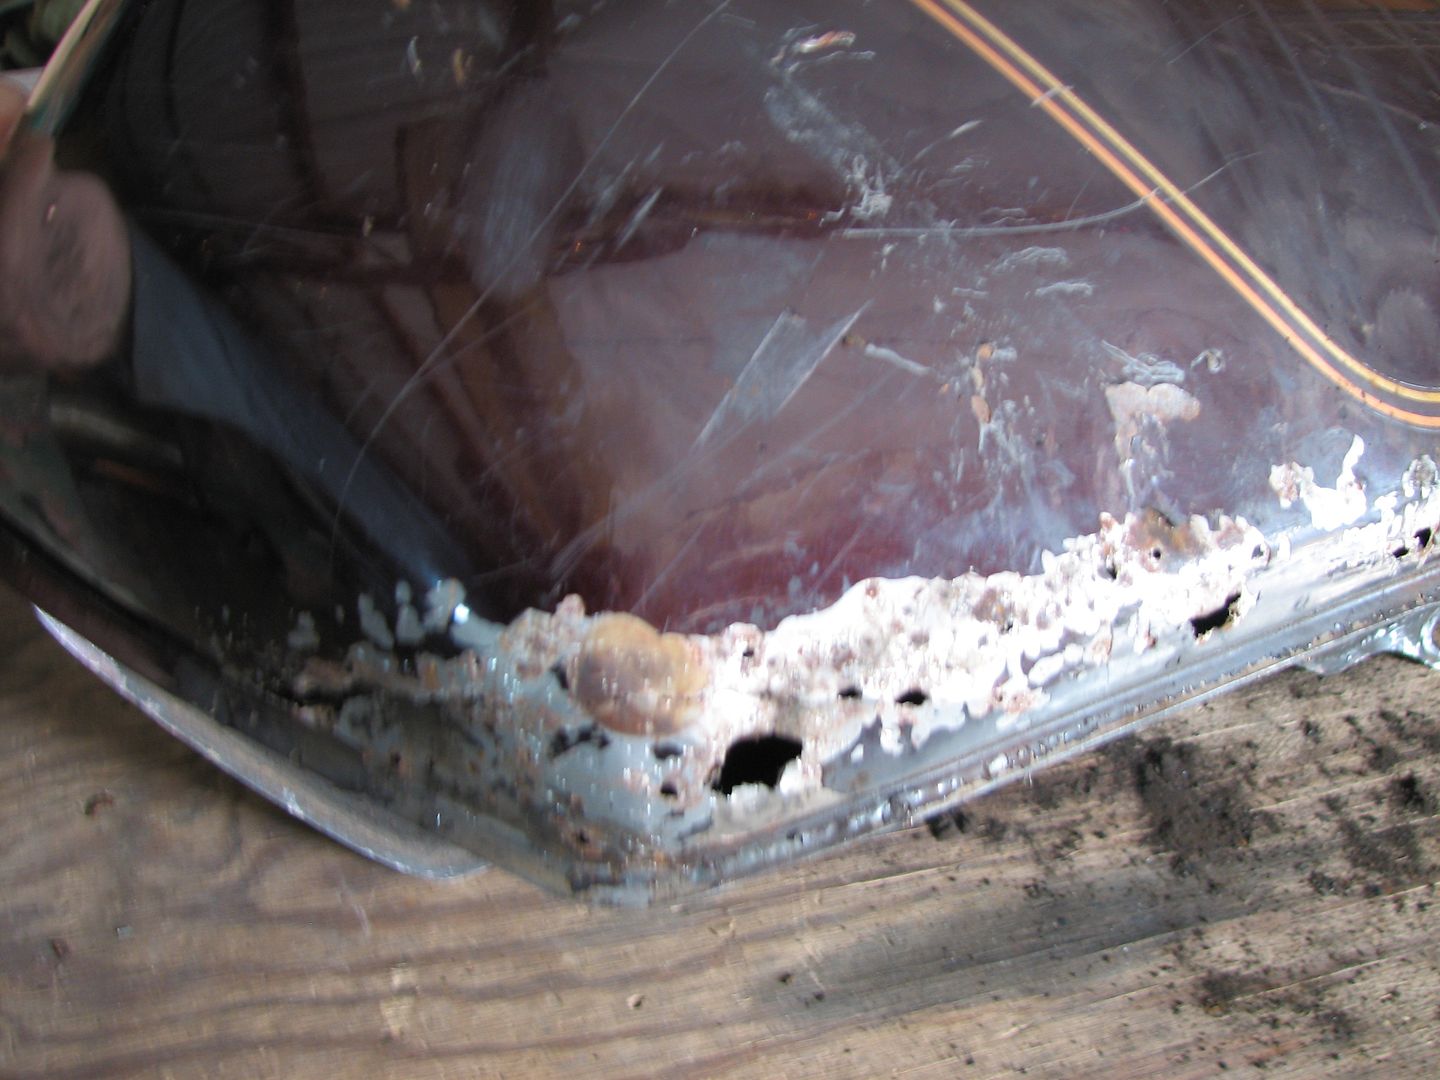
Then I decided to look into this bargain gas tank. I poured in a cup of sheet metal screws and shook the Hell out of it. I had known that the screws were going to be hard to get out of there. BB's are a better choice for most tanks. I thought all the sharp edges of the screws would a better job of busting up the rust that I suspected was inside. Well, the last photo shows just how well they did. I broke out the grinder to find the extent of the cancer. It's terminal. Only a crazy person would attempt to cure this tank. In the next installment, I'll show off my mad fab skills or my new gas tank.
Rand Man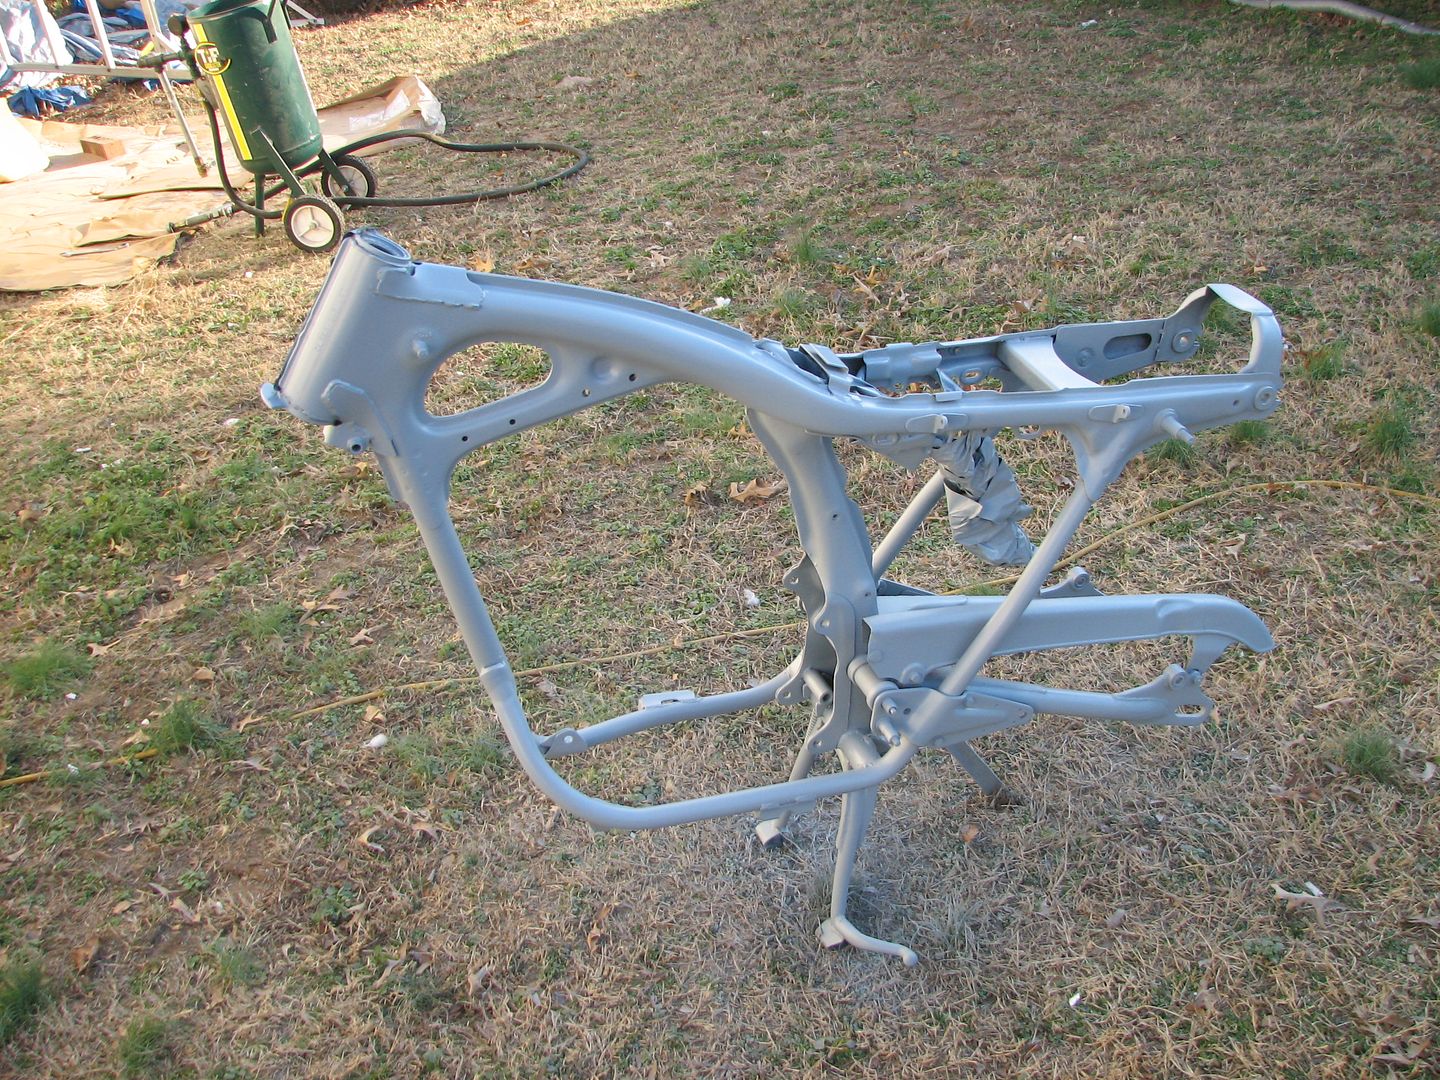
3/2/11
cb450 build/entry : part 8
Made some side number panels to give it more of the "racer" look I'm going for. TAS Motorsports hooked me up with some great prices on a chain, front brake pads, uni air filters and a gas cap seal. That still leaves me $58 in my budget to stay under $1000.
Brad

Subscribe to:
Comments (Atom)